使用

Xuan-Zhang Gong

引入gradle插件

id("tech.medivh.plugin.gradle") version "0.2.0"
id 'tech.medivh.plugin.gradle' version '0.2.0'

警告

如果你是通过源码构建,别忘了在setting.gradle中添加 mavenLocal()配置

pluginManagement {
    repositories {
        mavenLocal()
        gradlePluginPortal()
    }
}

配置 Medivh

构建完成之后,你可以直接在 Gradle配置文件中使用 Medivh

medivh {
    include("com.example") // 你的包名
}
medivh {
    include 'tech.medivh' // your package name here
}

在需要的地方加注解

package tech.medivh.demo.kotlin
//  注意这里的包要和在gradle配置的包一致
import tech.medivh.api.DebugTime

class DemoClass {
    @DebugTime
    fun helloWorld(){
        println("Hello World")
    }

}

编写测试

import org.junit.jupiter.api.Test

class DemoClassTest{
    
    @Test
    fun testDemo(){
        val demoClass = DemoClass()
        repeat(10){
            demoClass.helloWorld()
        }
    }
}

在你的 IDE中执行
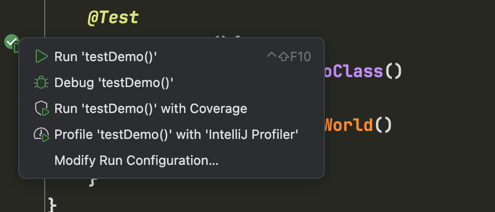
Run your test

或者使用命令

./gradlew test

查看控制台输出

你会看到类似于这样的输出:

you can open file:///xxx/report.html to see the report

点击上面的链接,你将看到你的测试报告

完整示例

这里有一个完整示例,你可以参考这个示例open in new window来使用Medivh

更多配置查看

这里有更多高级配置用法

最后更新时间 10/24/2024, 8:41:54 AM